This article will help you understand how to invite and change User Permissions within your Bitumio account.
TABLE OF CONTENTS
- Access the User Screen
- Invite a New User
- How to Resend a User Invite
- Updating a User Account
- Deleting a Current User
- Managing User Permissions
Access the User Screen
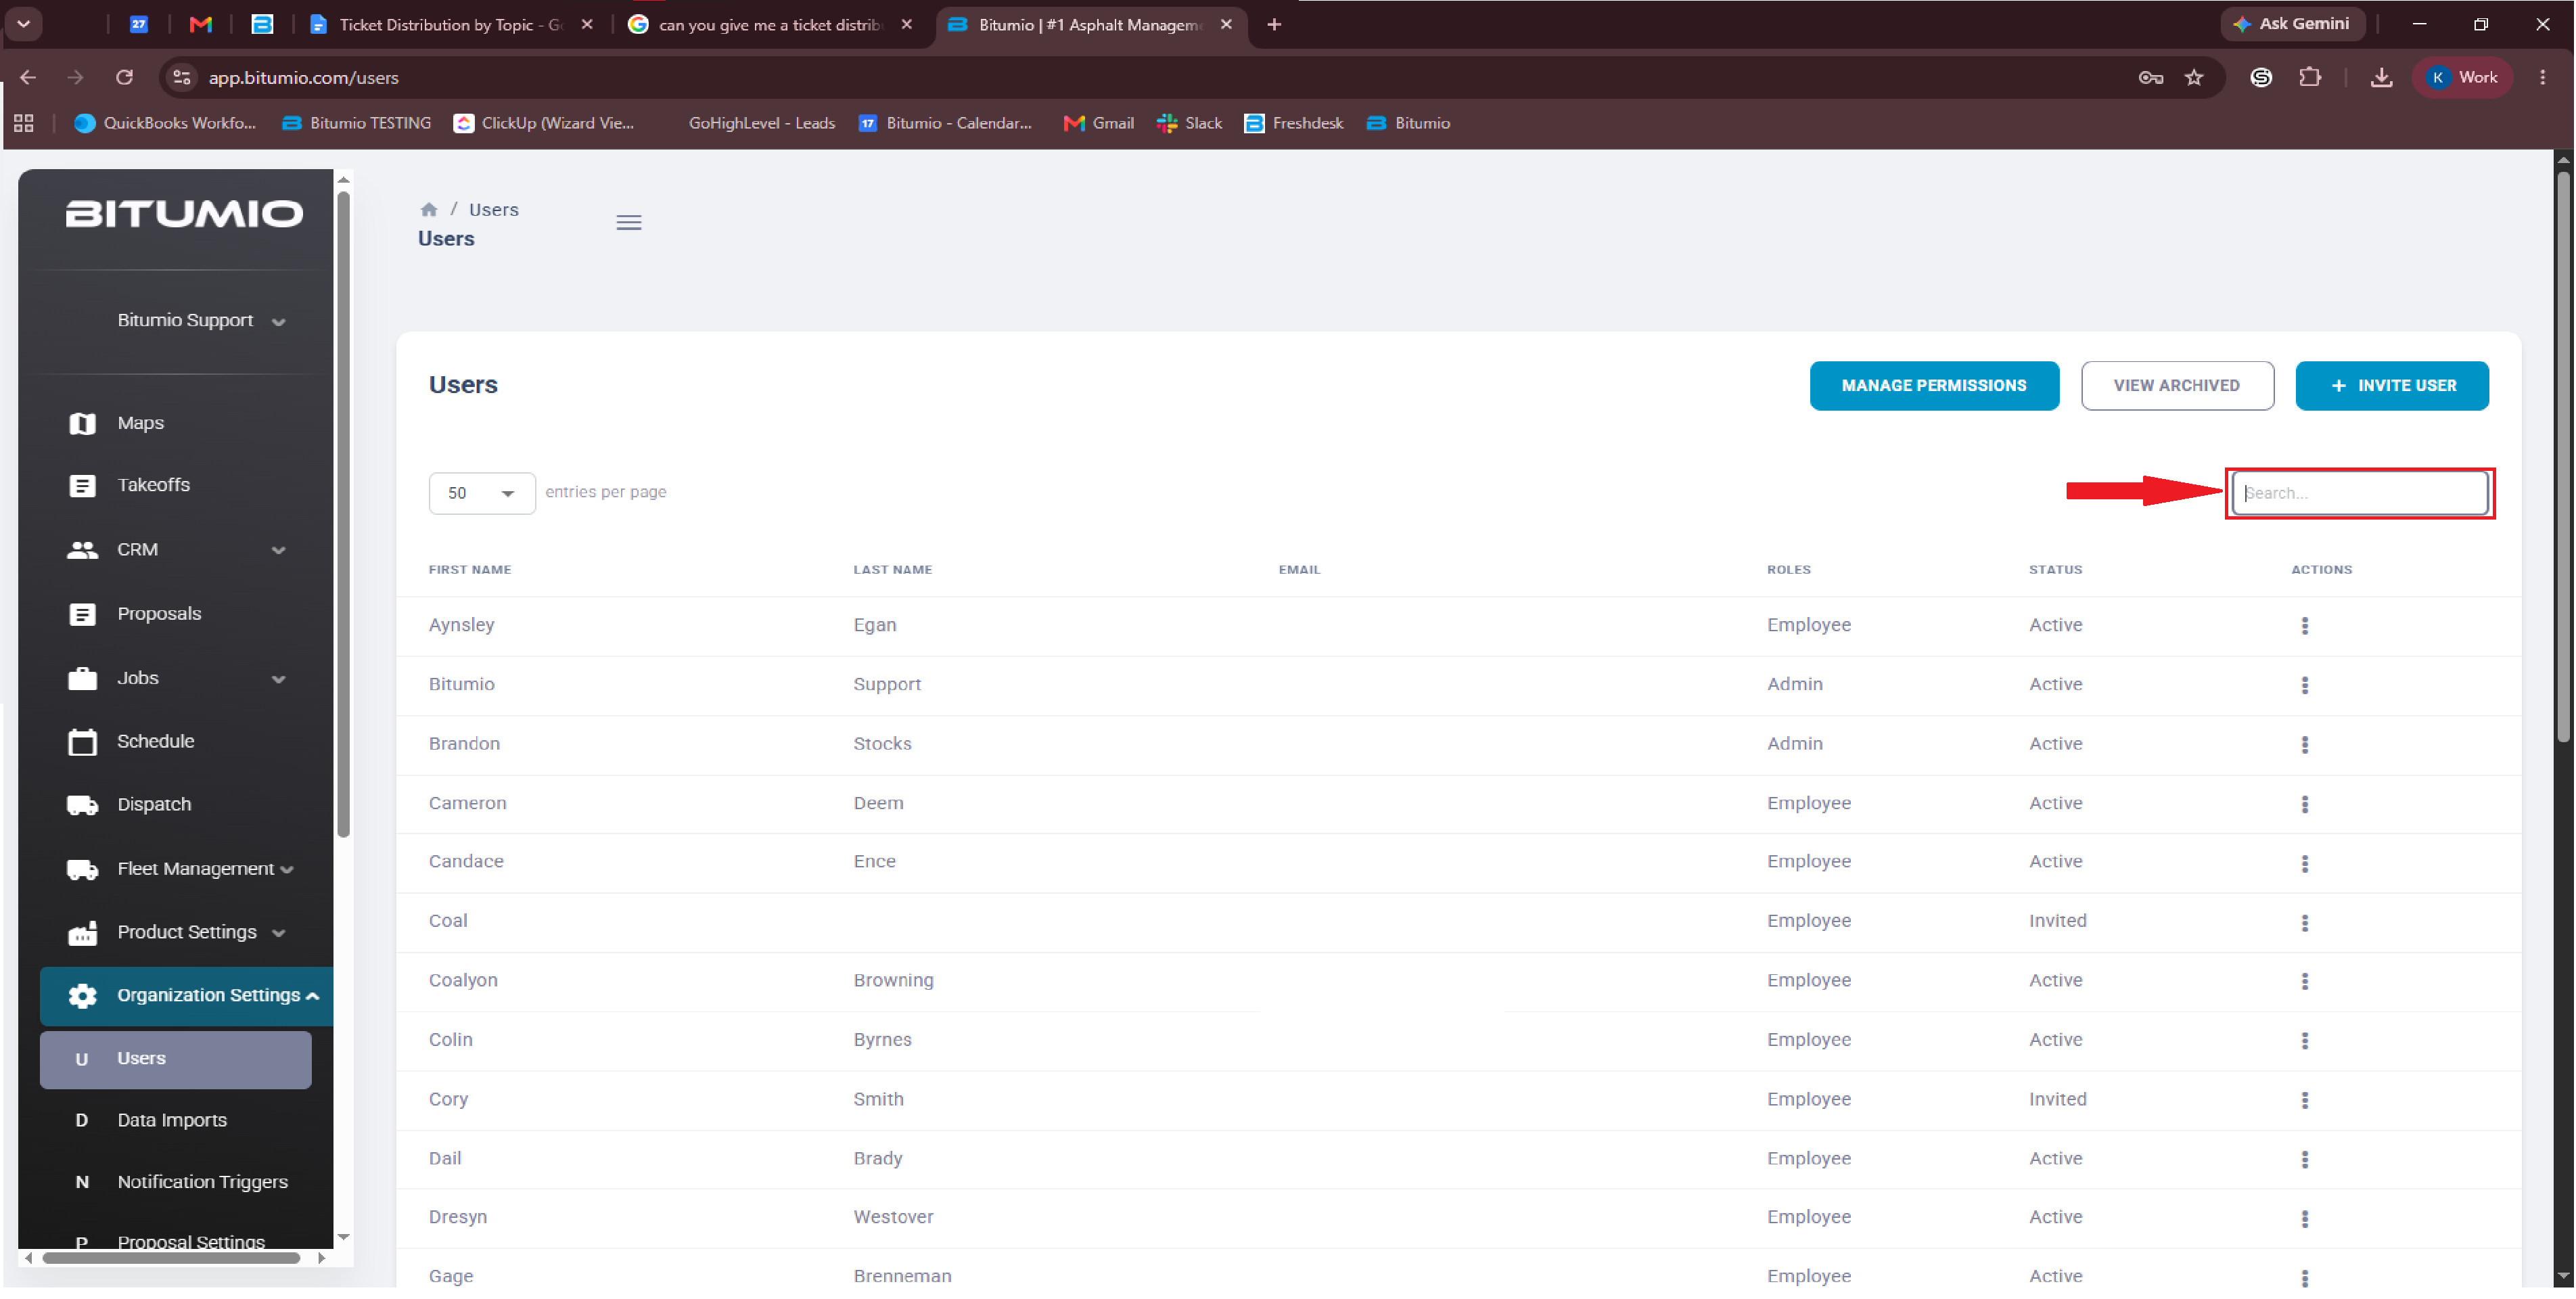
Bitumio > Left Navigation Bar > Organization Settings > Users1. Follow the above-mentioned workflow to land on the Users screen.
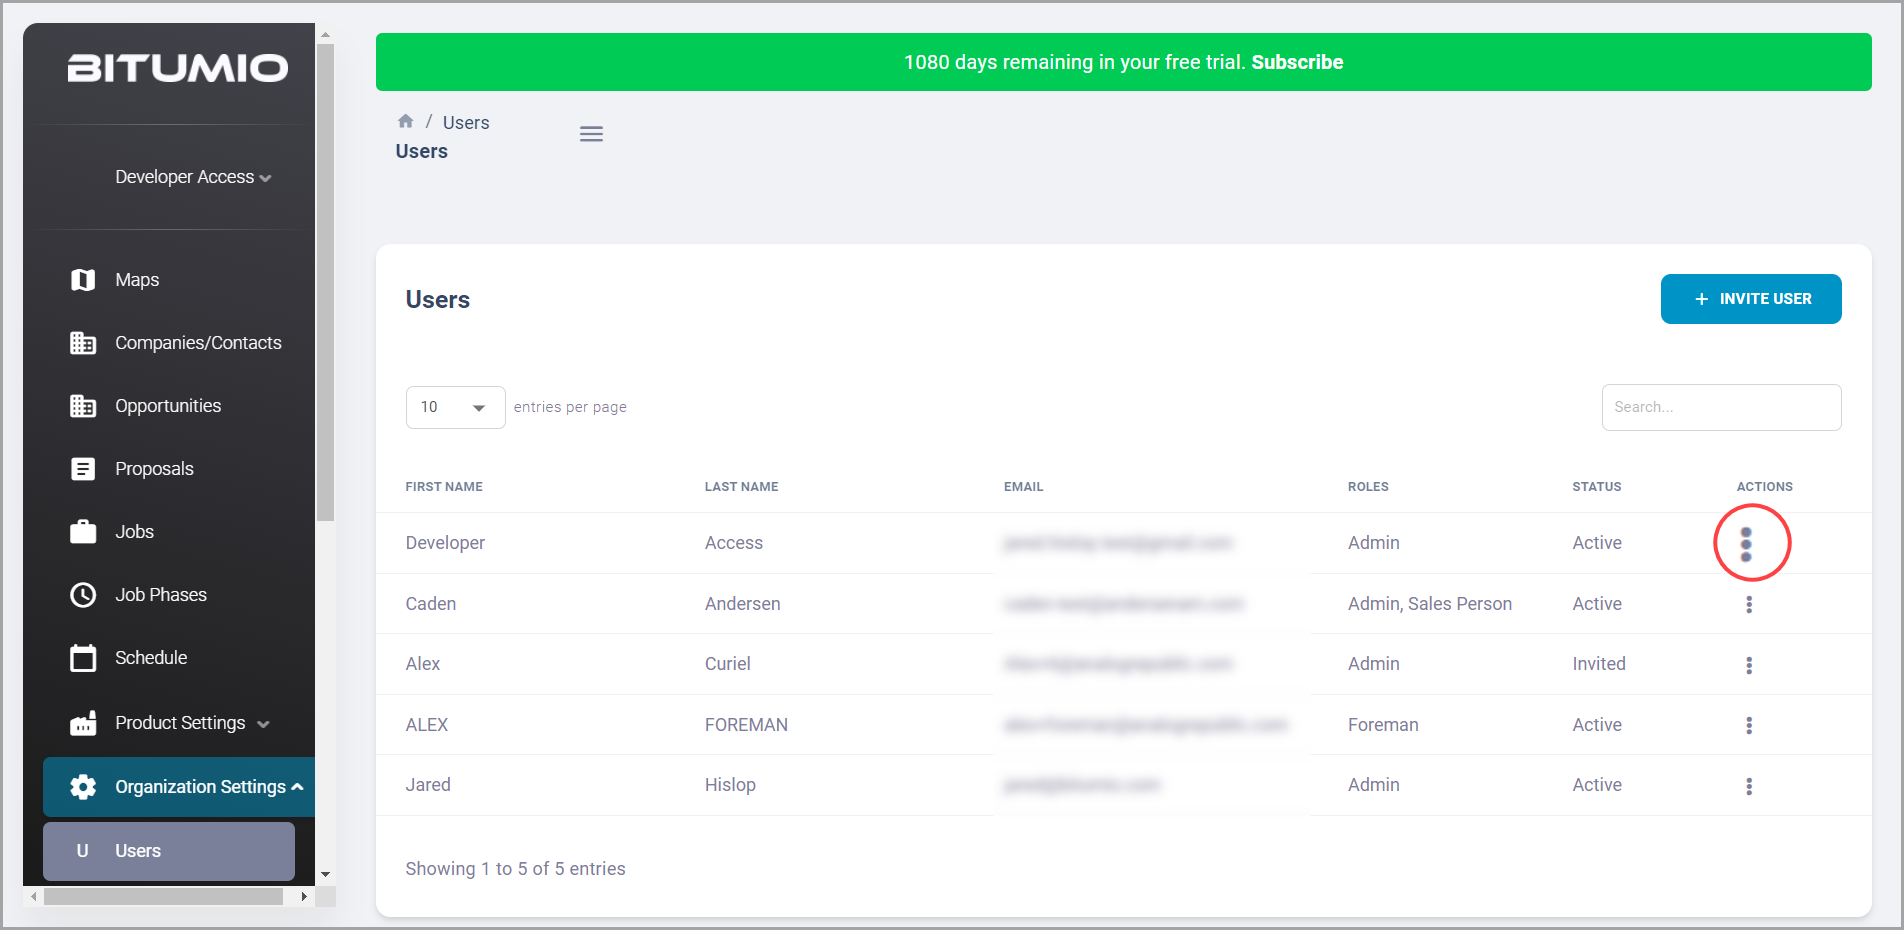
2. Users are displayed in various columns that include First Name, Last Name, Email, Roles, Status, and Actions.
3. You can search for a specific user using the search bar at the top-right corner of the screen.
Invite a New User
1. Click the  button located at the top-right corner. This takes you to the Invite User screen.
2. Here, you record the User information. Required fields include the First Name, Last Name, and Email fields. Fill in other information if available.
3. Select role you want to assign this User from the Role dropdown.
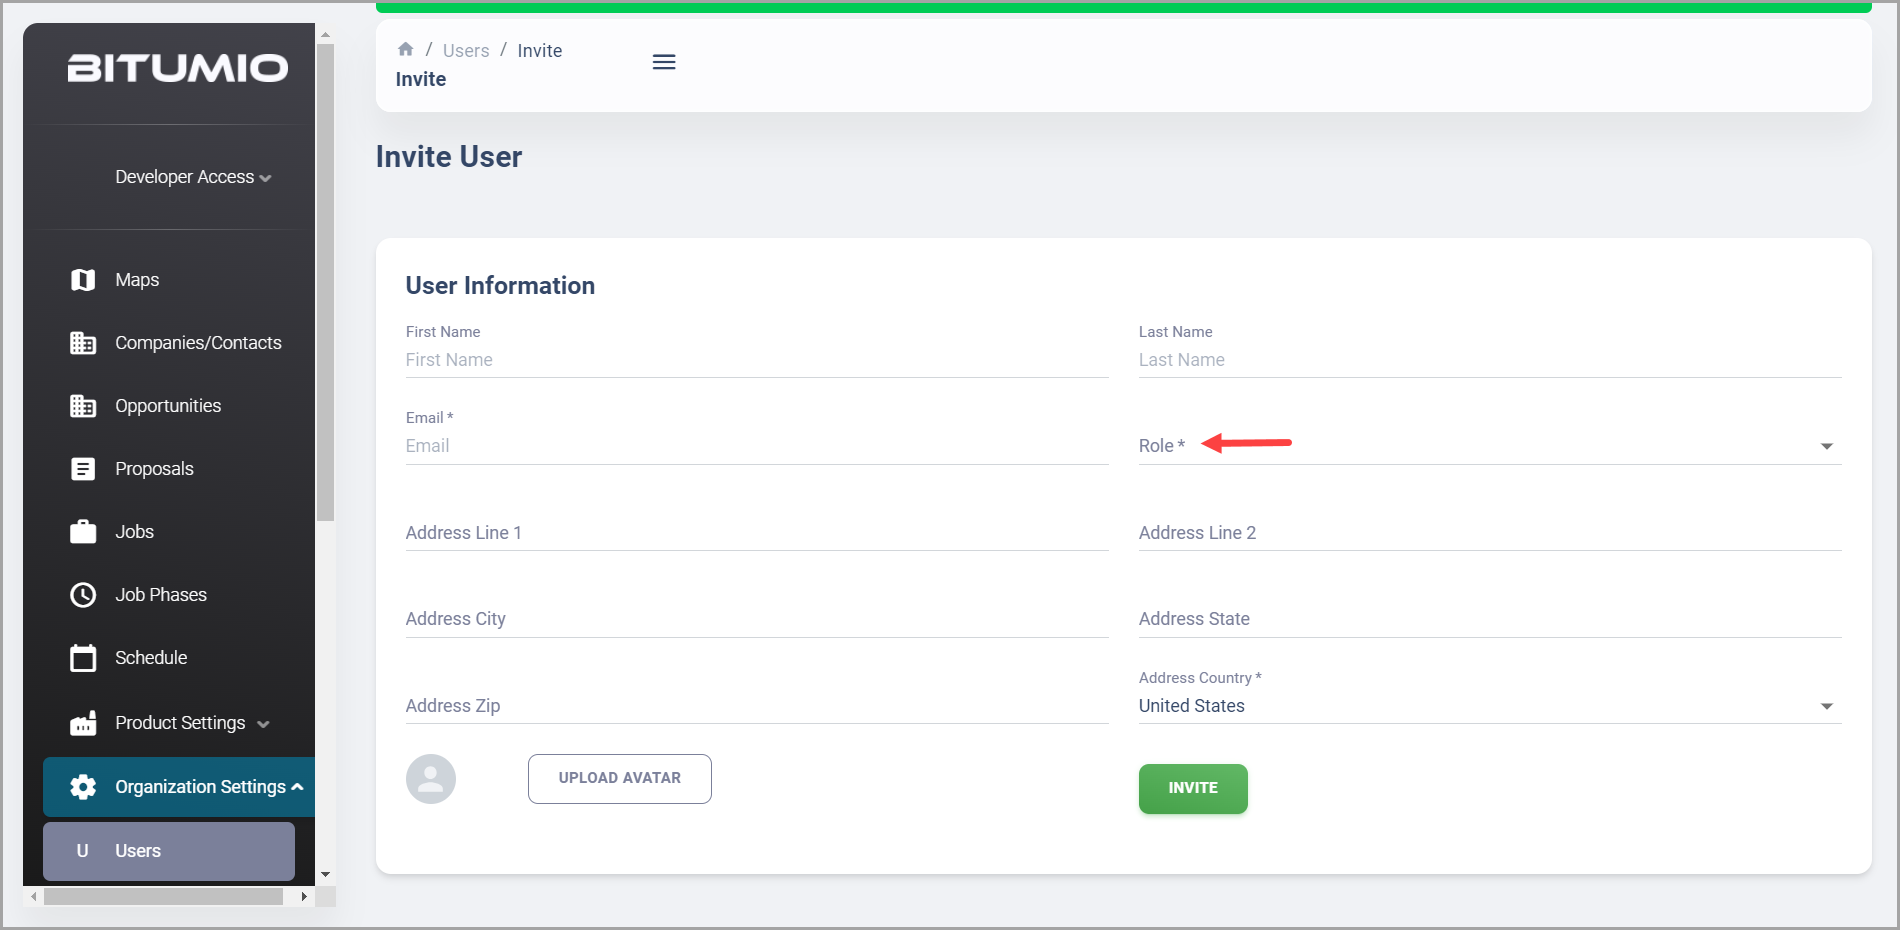
4. Once the required details are recorded, click the  button.
How to Resend a User Invite
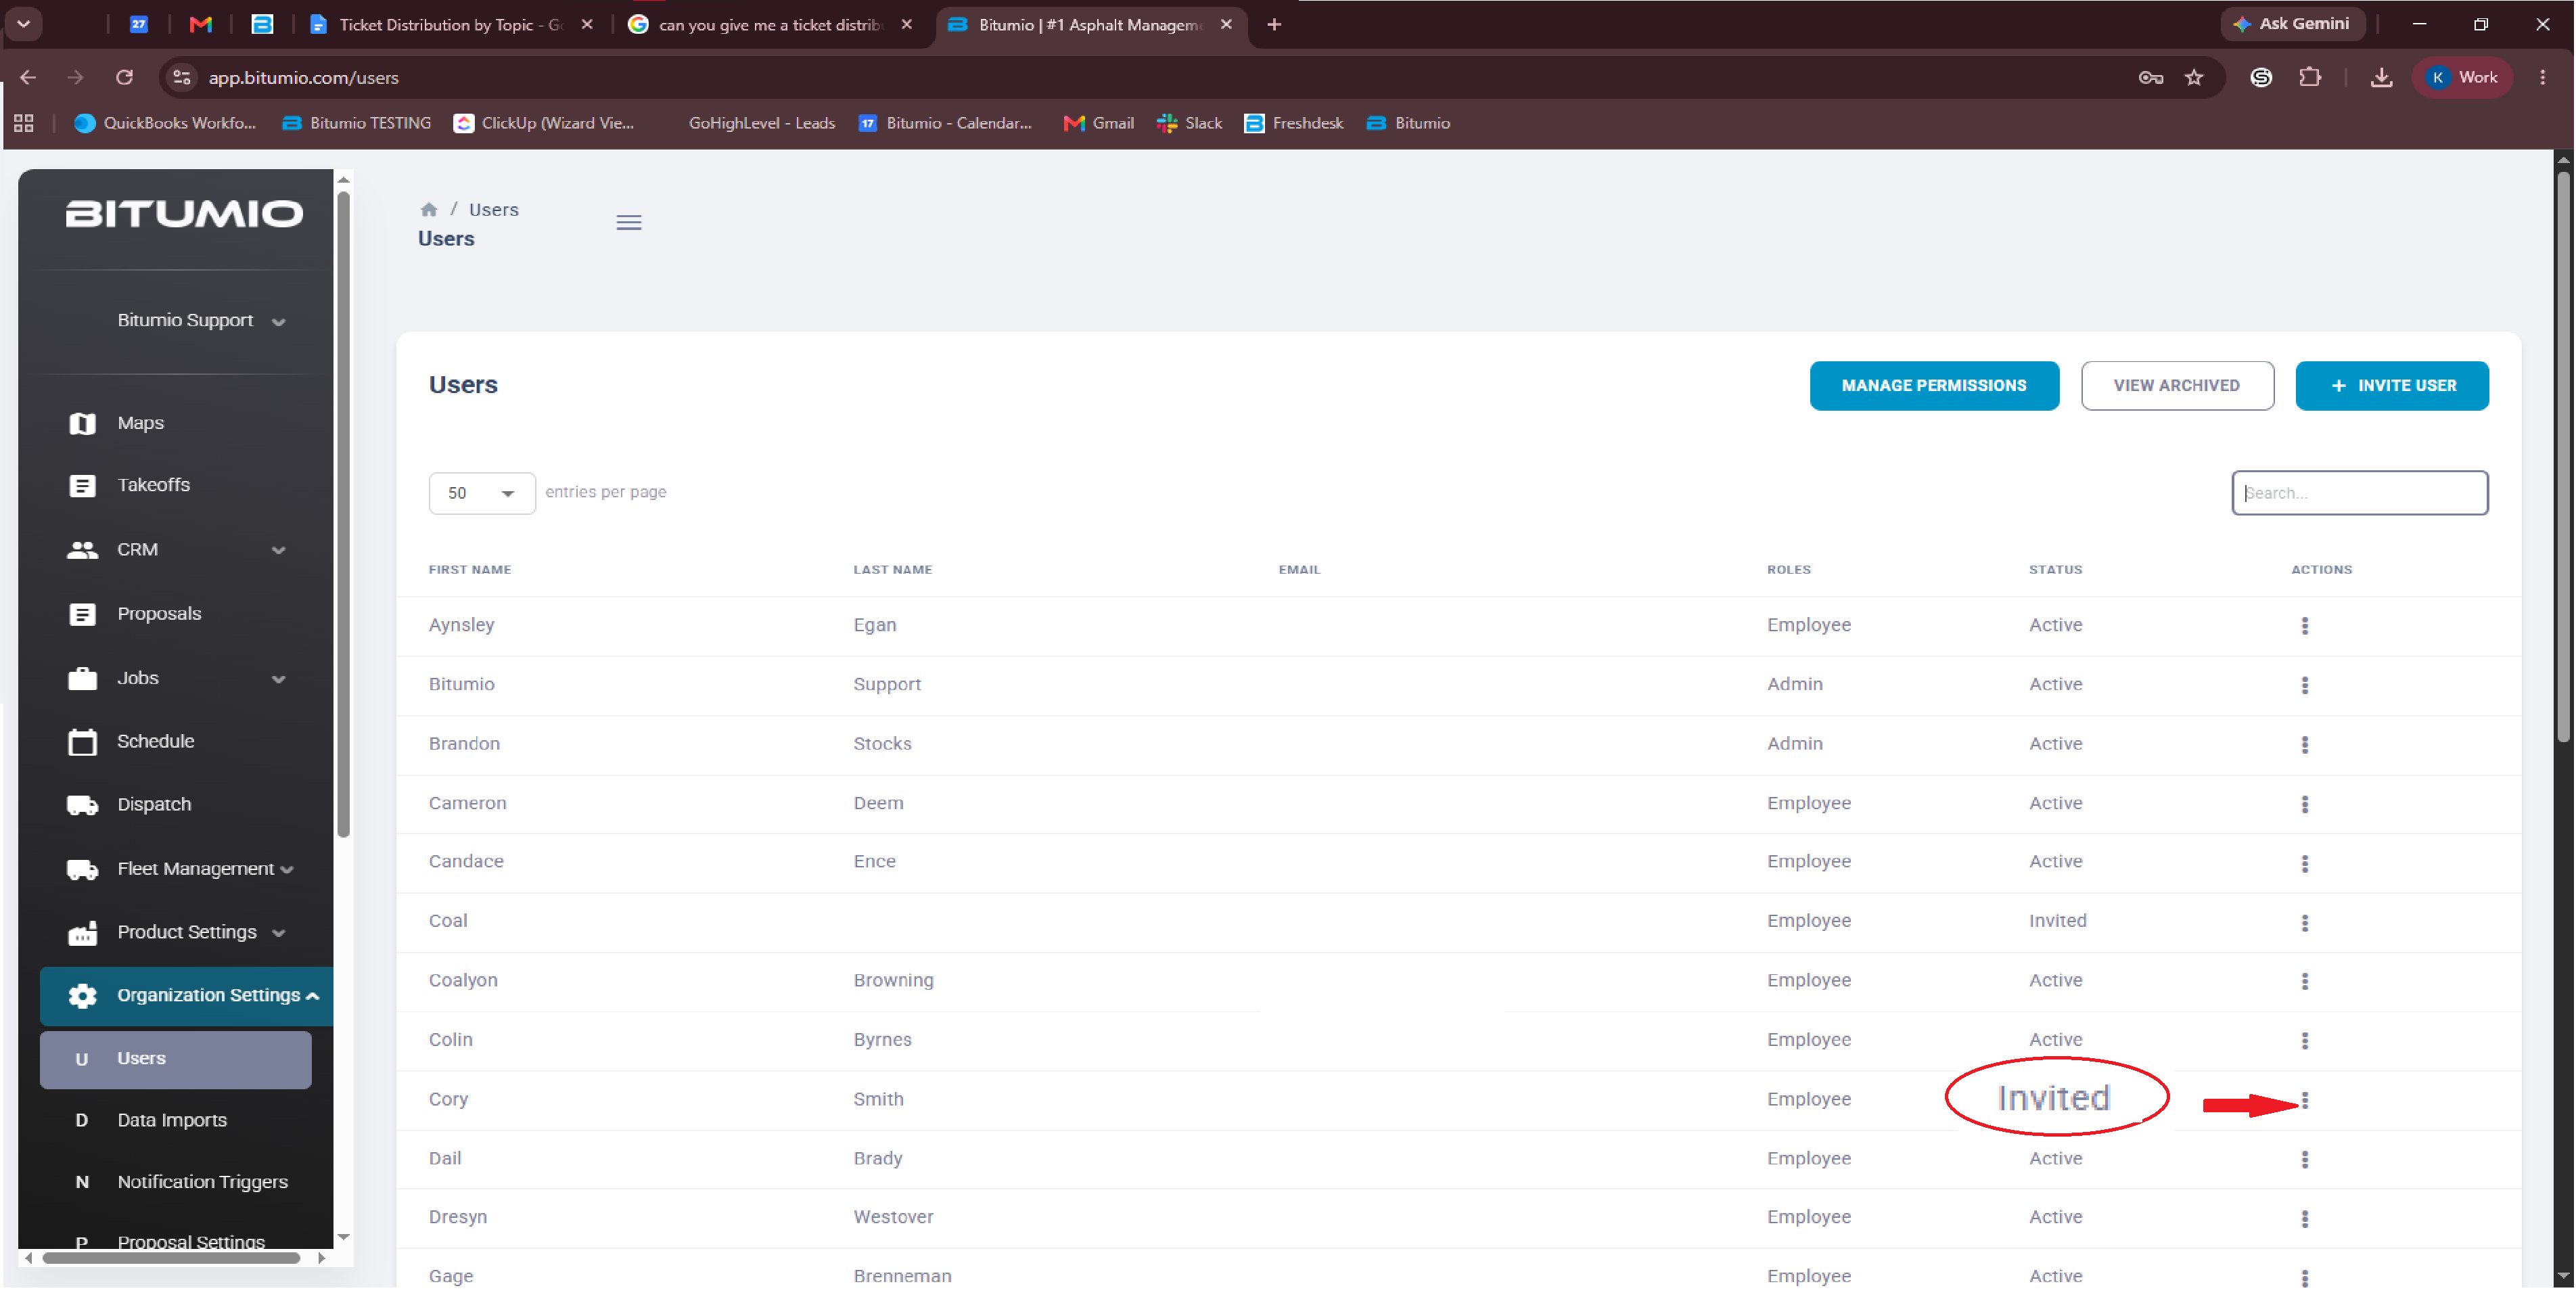
Once a User Status is Invited, click the  icon located under the Actions column. From these options, click Resend Invite.
Updating a User Account
1. For a user you want to update, click the  icon located under the Actions column. Choose Update Account.
2. This takes you to the Updating [User Name] screen where all details are displayed in an editable view.
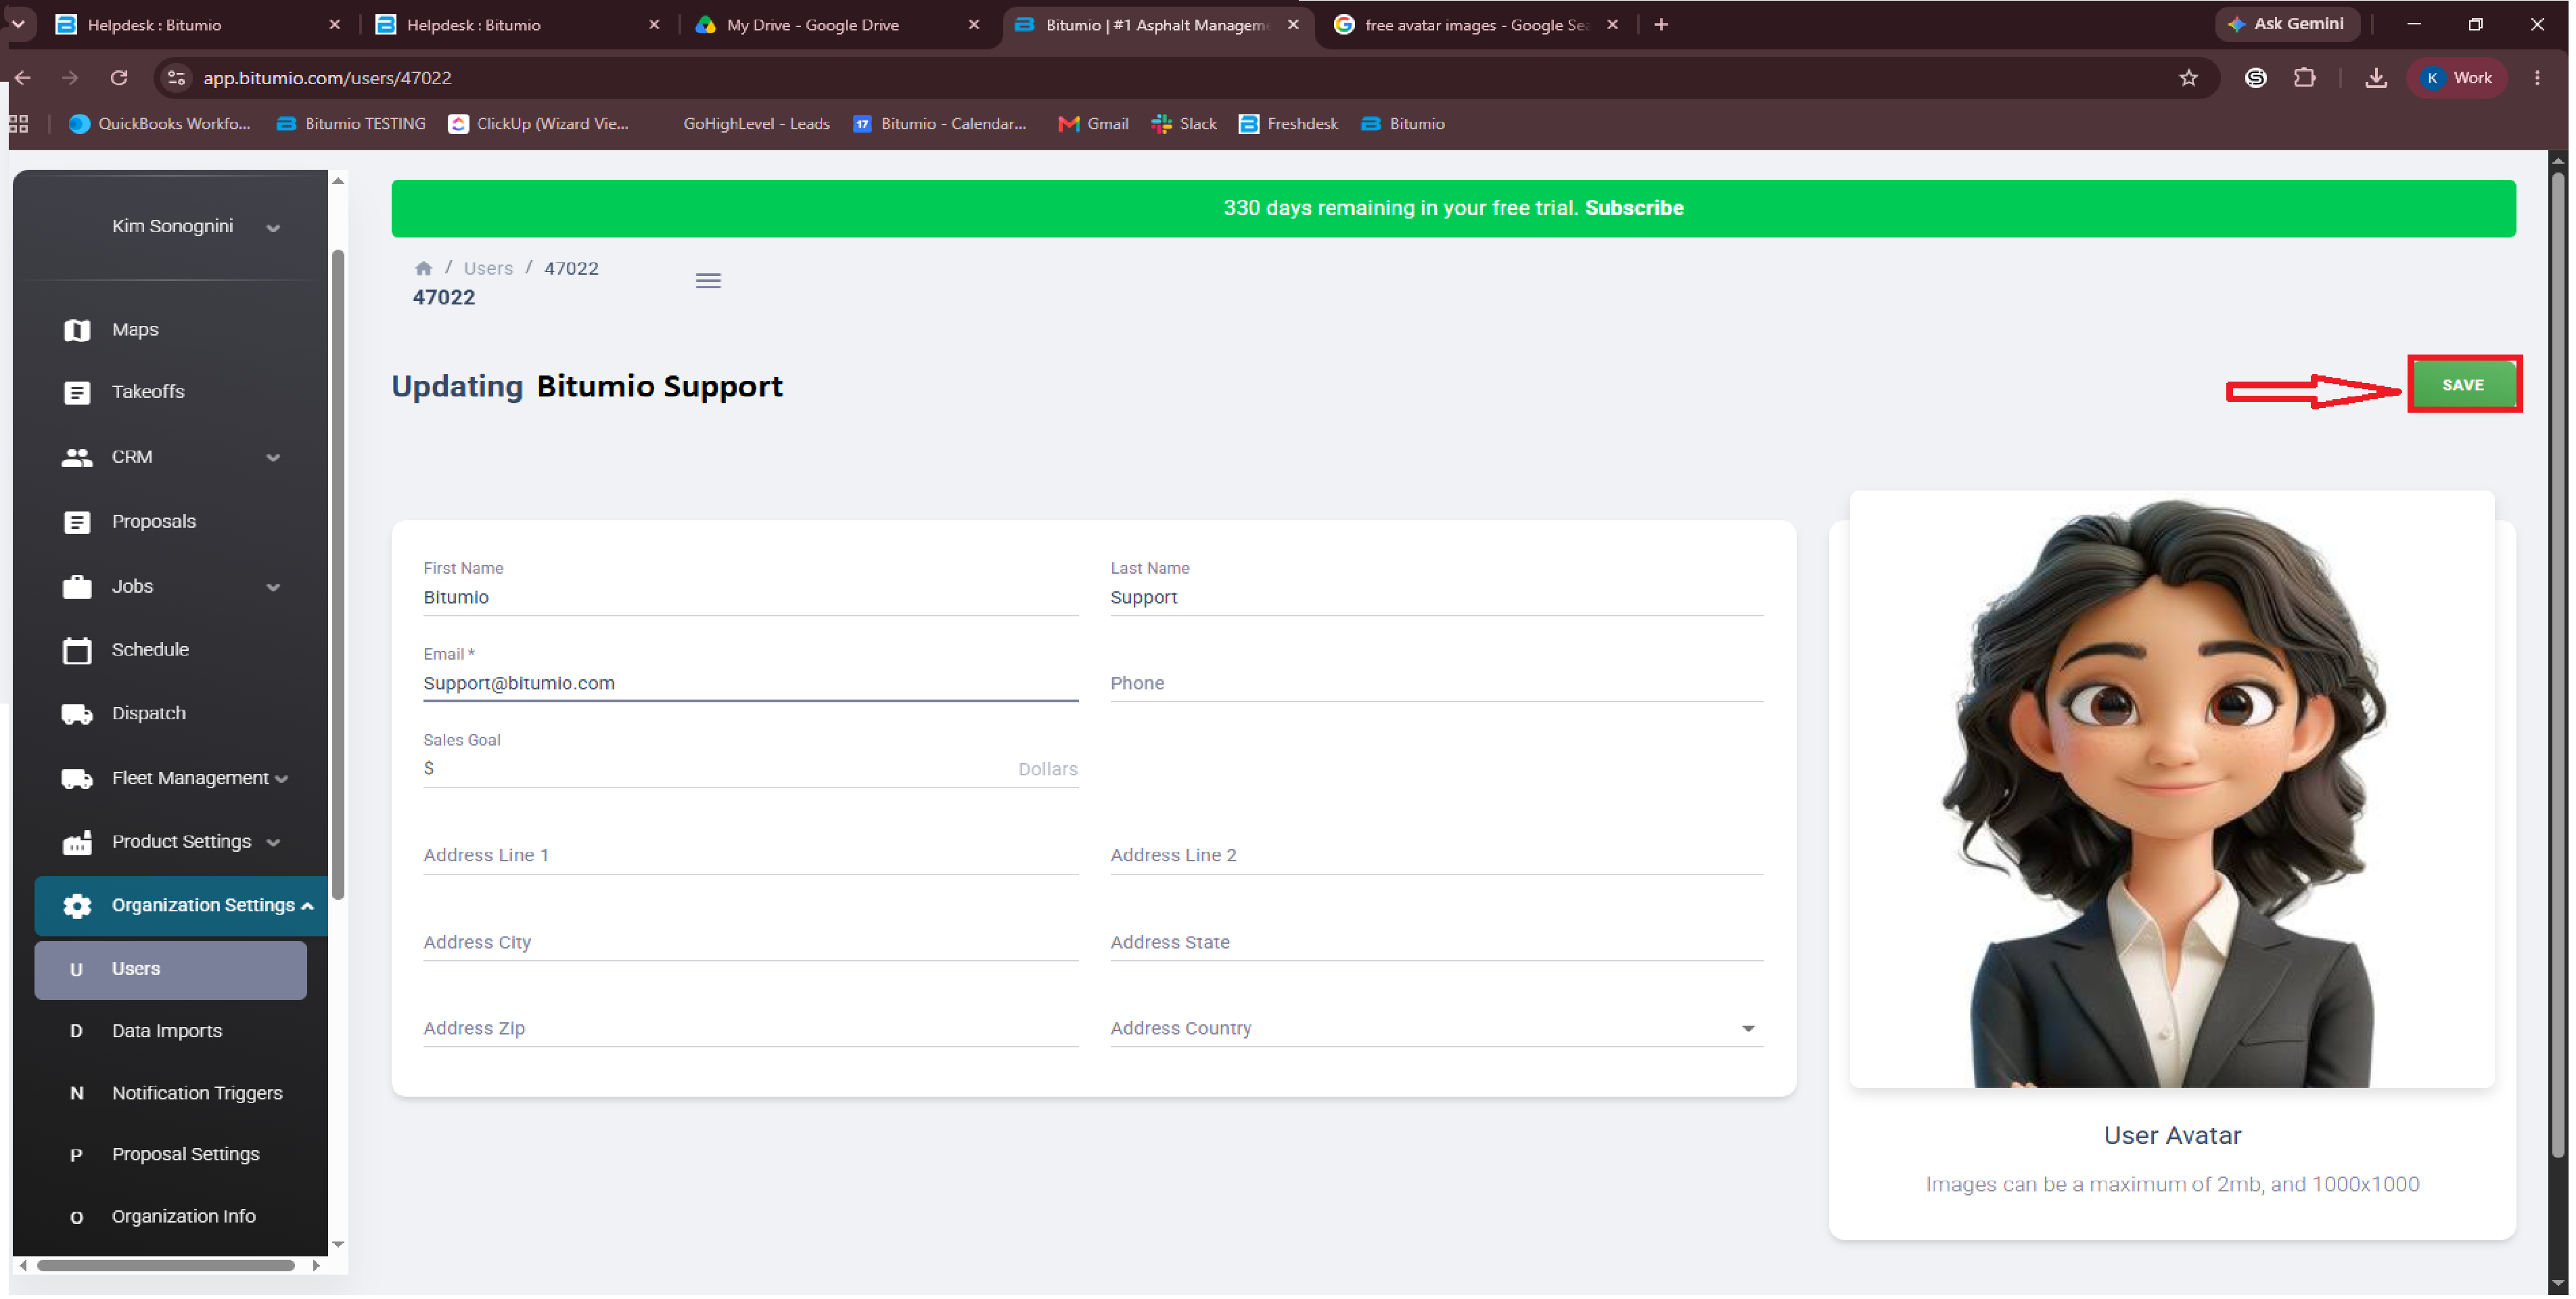
3. Once the required changes are made, click the  button.
Deleting a Current User
1. For a user you want to delete, click the  icon located under the Actions column. From these options, click Delete Account. Doing so opens the Confirmation popup.
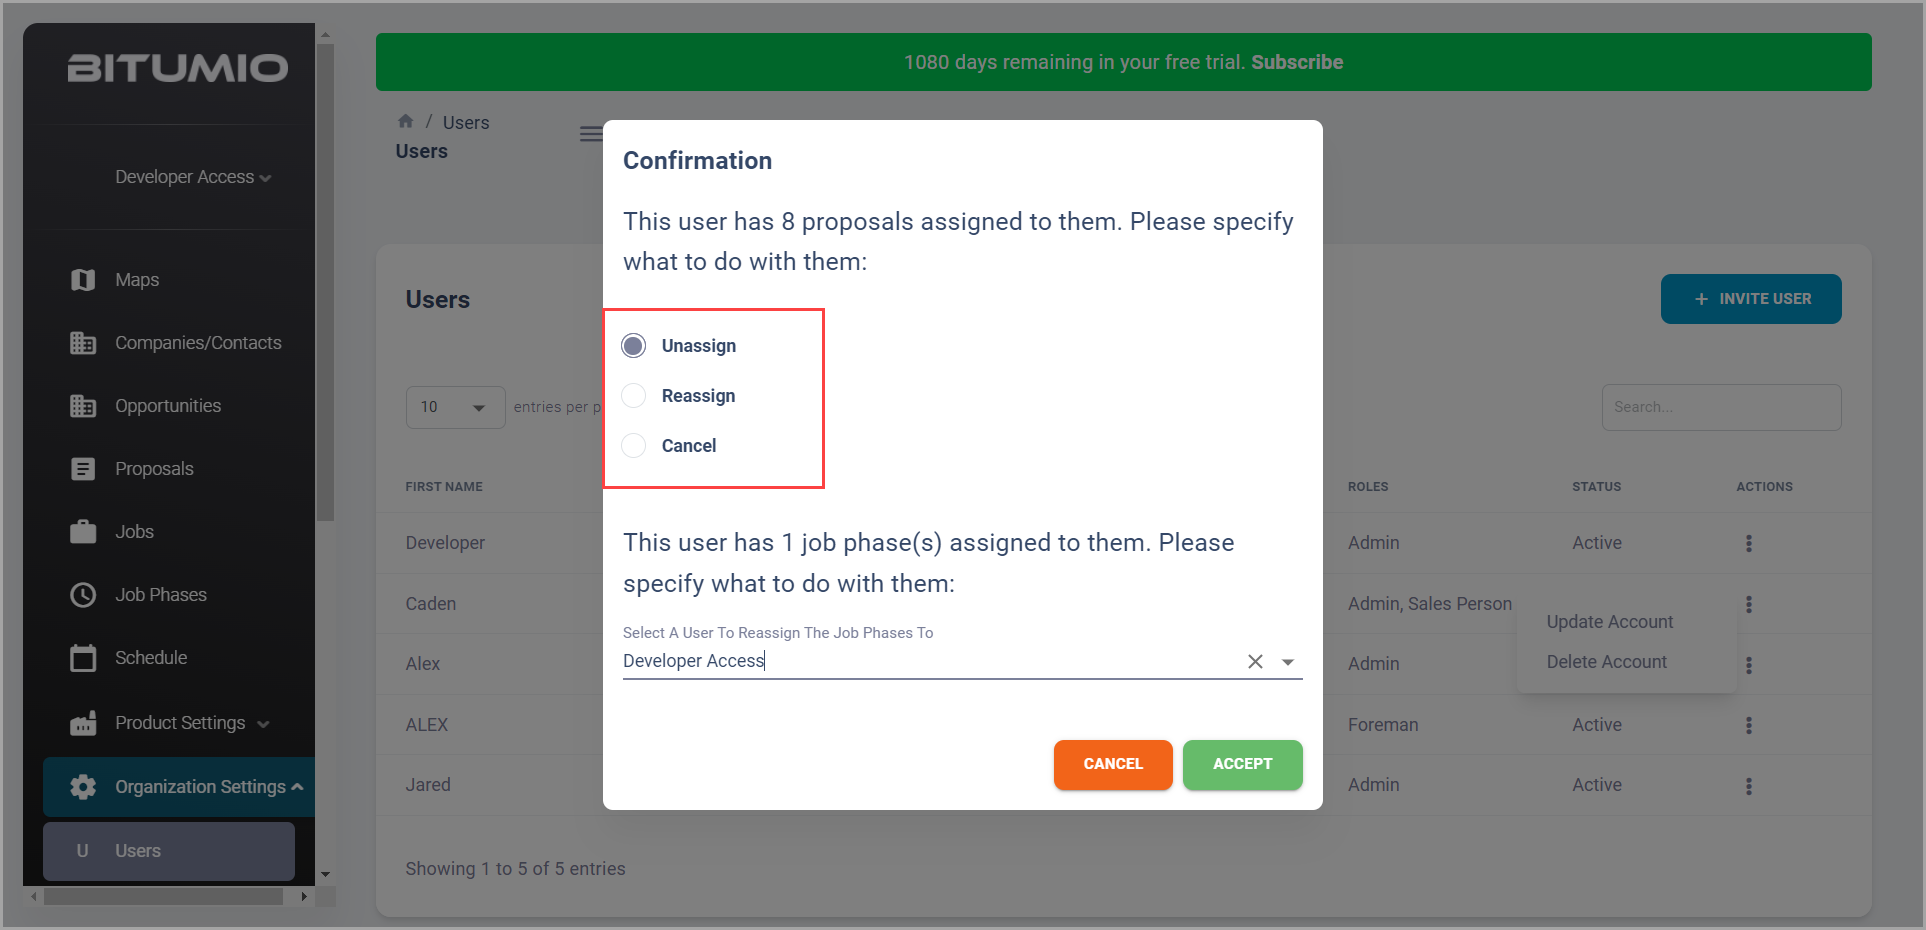
2. Use the radio buttons to select what you want to do with the assigned proposals once the User is deleted.
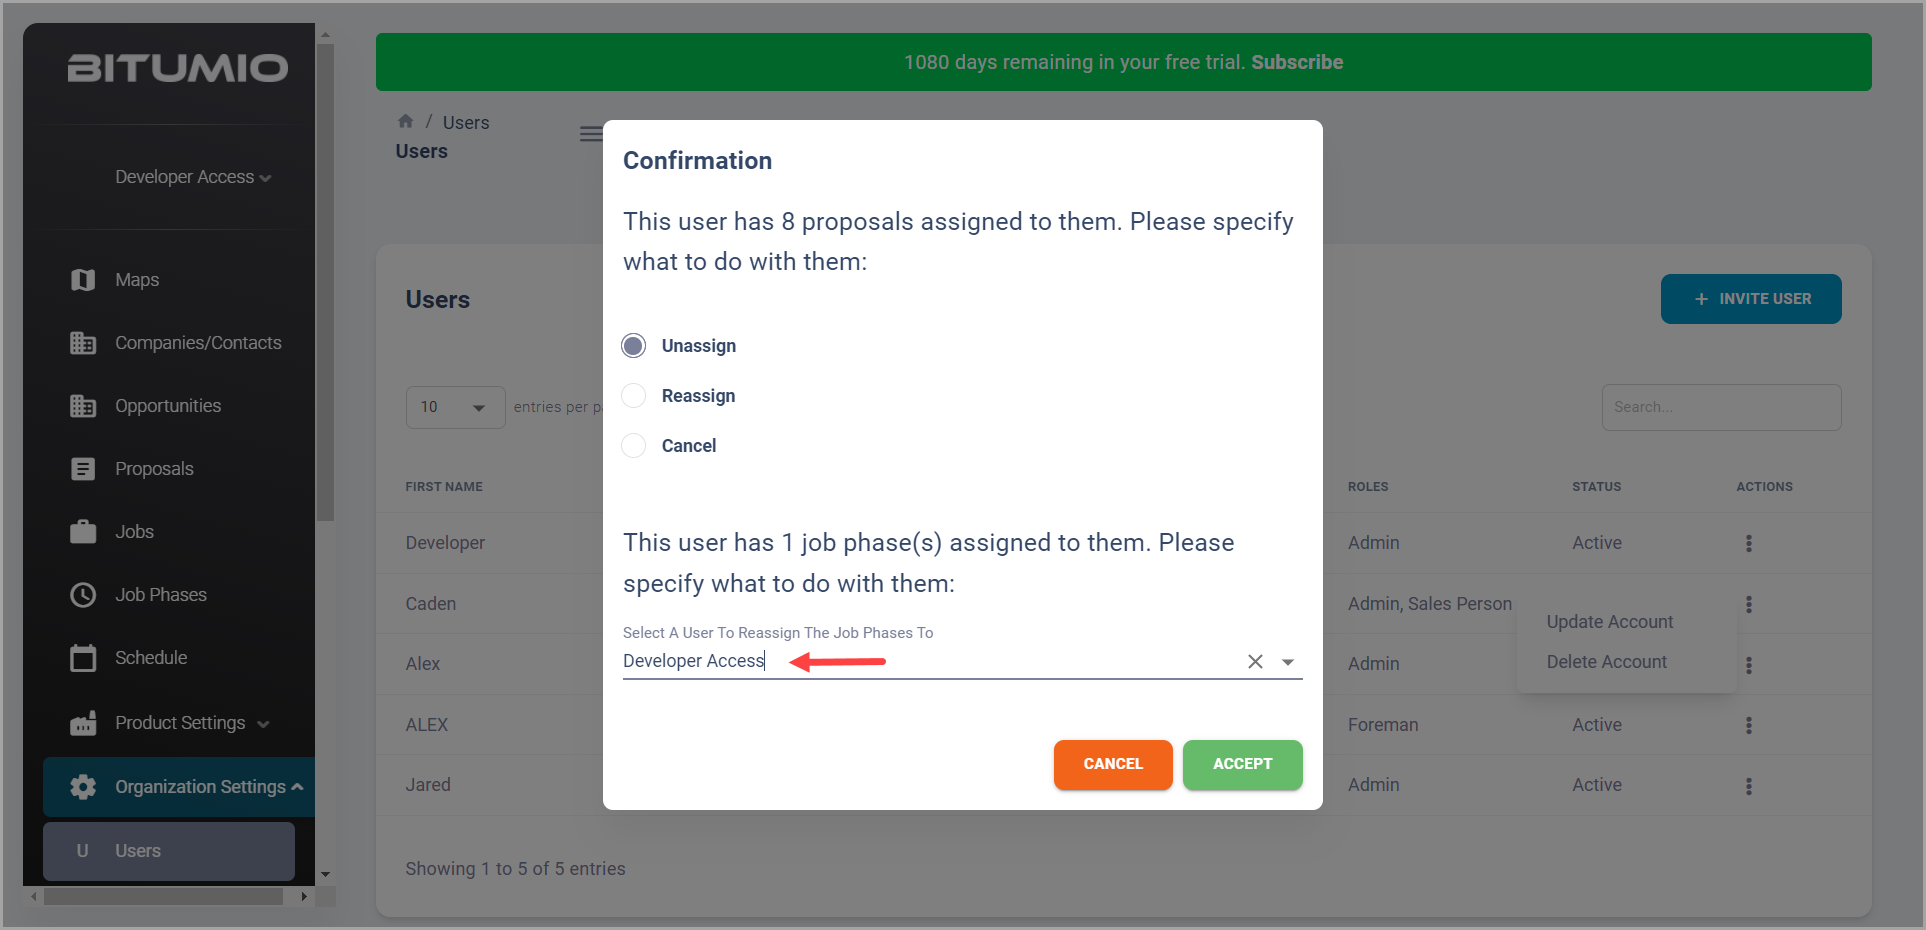
3. Select a new User from the dropdown menu to reassign the job phases.
4. Once the required selections are made, click the  button.
Managing User Permissions
1. Select Manage Permissions button from the top right of the Users screen.

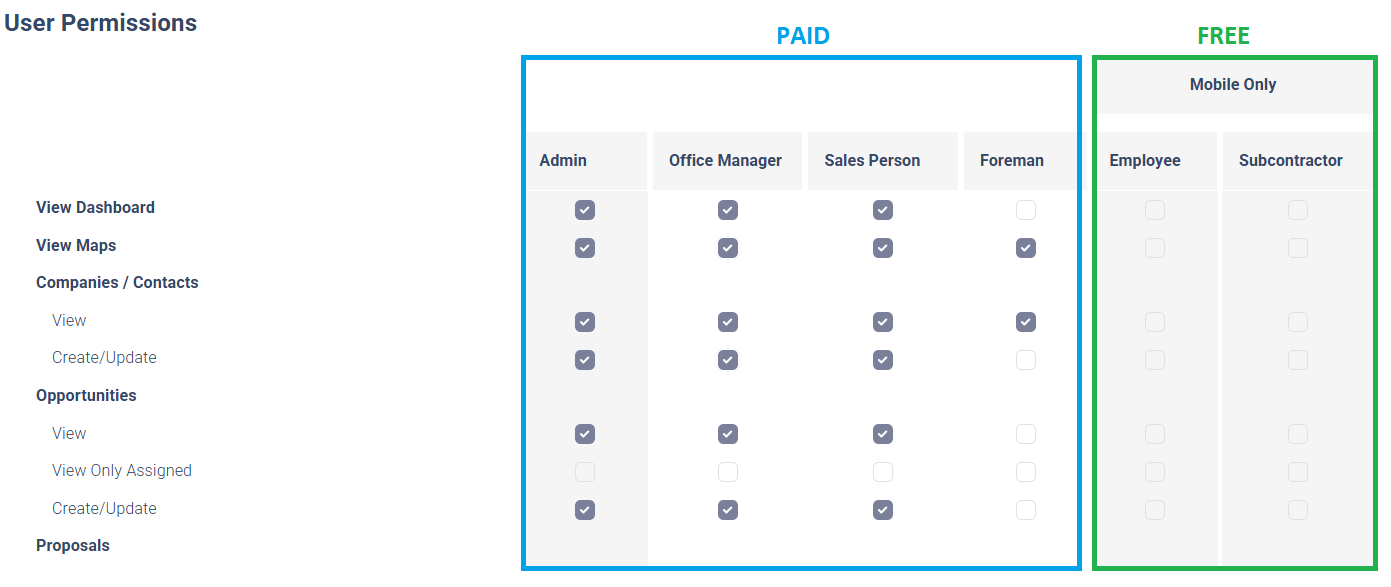
2. Control Bitumio access by customizing User permissions based on Roles.
3. Bitumio offers two levels of access—Paid and Free—which are determined by the assigned User Role.
- Paid accounts may be given access to view and edit features such as Opportunities, Proposals, and the Schedule. This includes mobile access.
- Free accounts are limited to viewing specifically assigned Jobs and Time Tracking through their mobile app.
3. Once permissions have been assigned, click the button.
Was this article helpful?
That’s Great!
Thank you for your feedback
Sorry! We couldn't be helpful
Thank you for your feedback
Feedback sent
We appreciate your effort and will try to fix the article